If you’re tired of manually importing documents from your email inbox, DocBits has got you covered. With our email import feature, you can automate the process and save time.
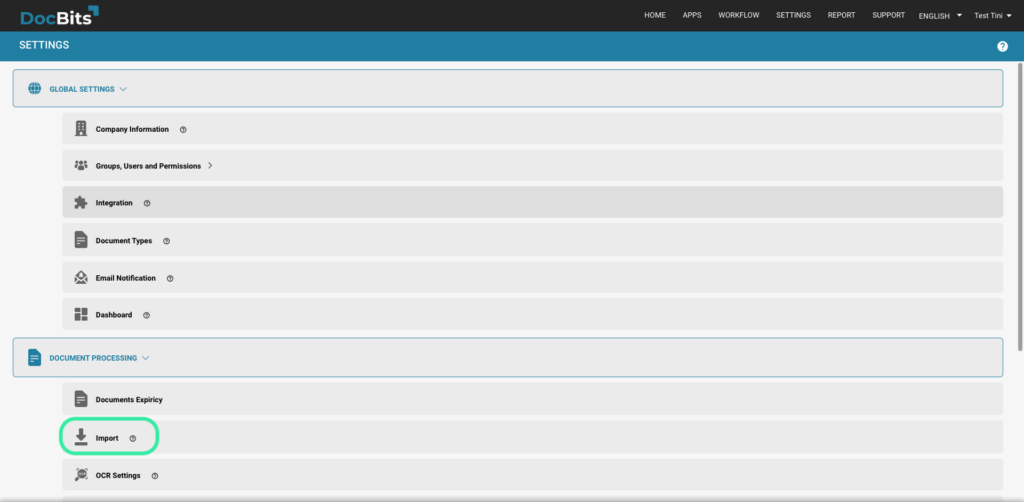
Go to the Settings menu and select “Import”.
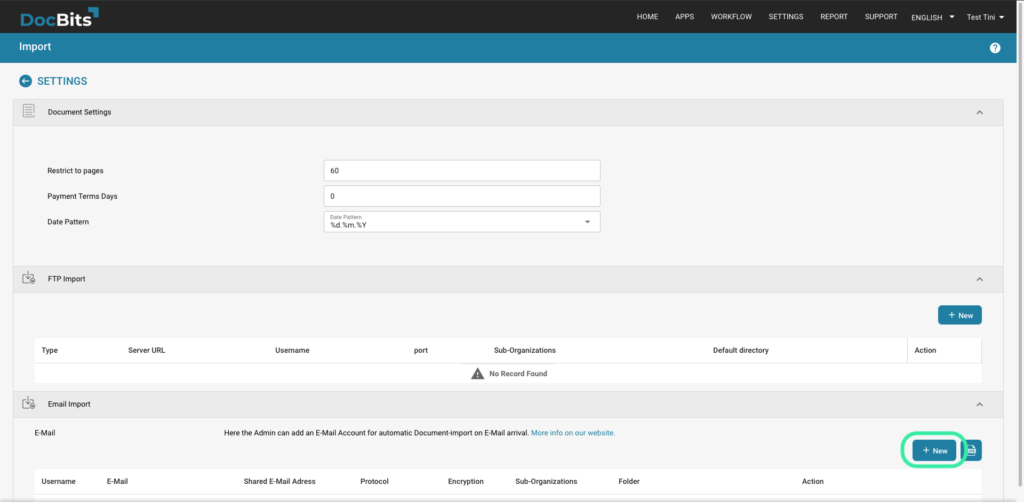
Scroll to the bottom of teh page and select the NEW button to create a new email import.
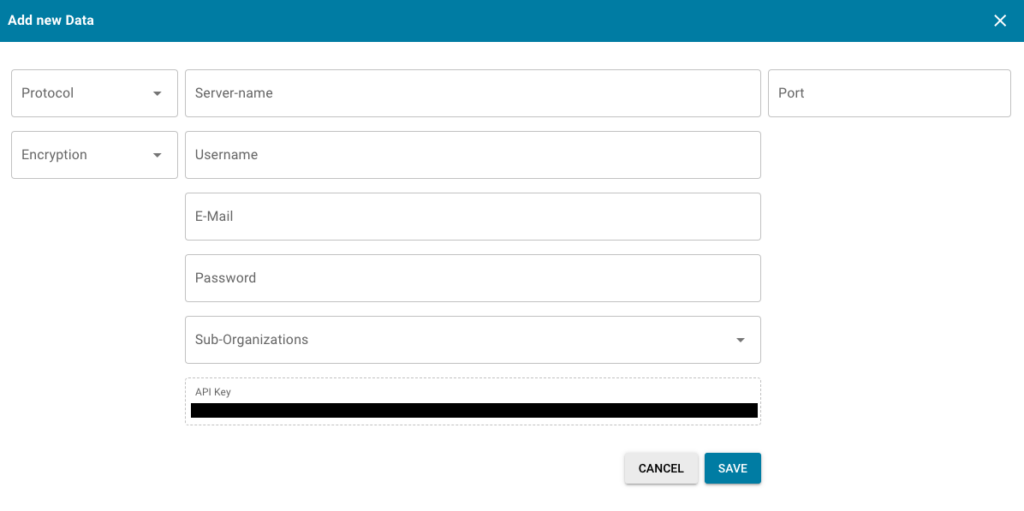
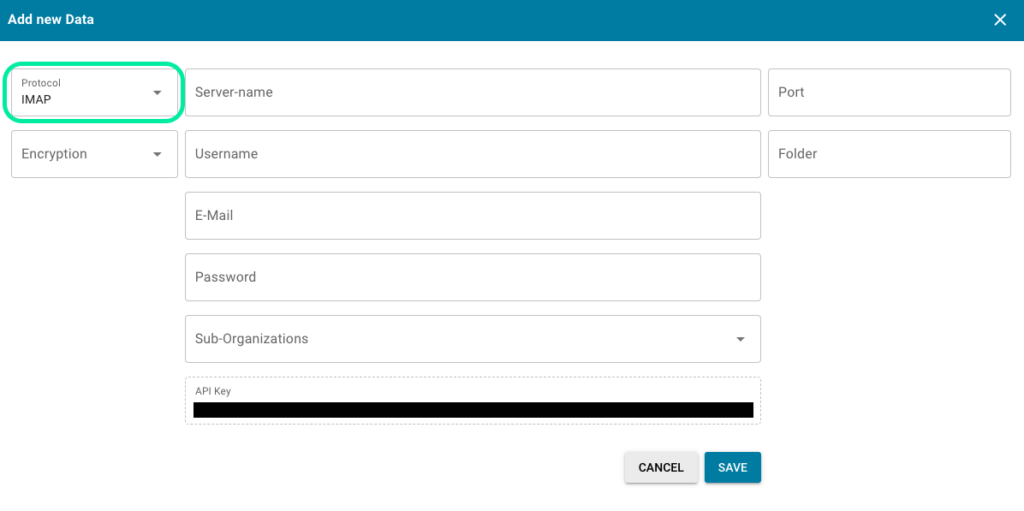
After pressing NEW, the following menu will be shown to you
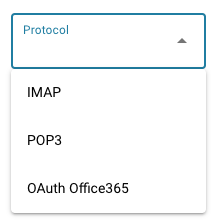
Here you can select which Protocol you would like
Here you just need to enter the required information for your email provider, encryption, server name, port, username, email address, password as well as the email folder.
Things to Note
Here you just need to enter your desired sub-organization and press Authenticate

You will be taken to this Microsoft page and you will need to enter a code.
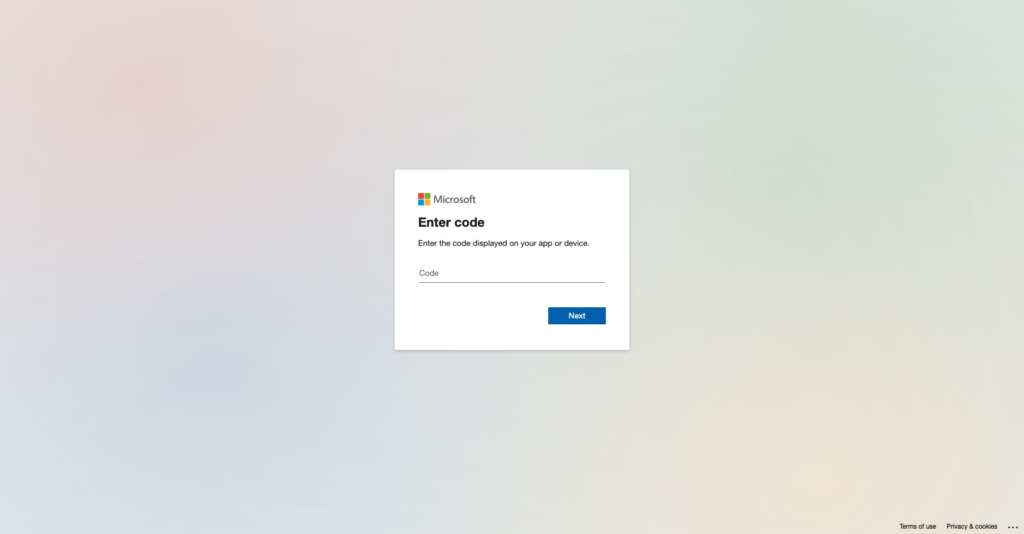
This code can be found by clicking back to DocBits and the code will be displayed there like below, simply copy the code and enter it into the Microsoft page. Thereafter you will need to enter your own Microsoft credentials.

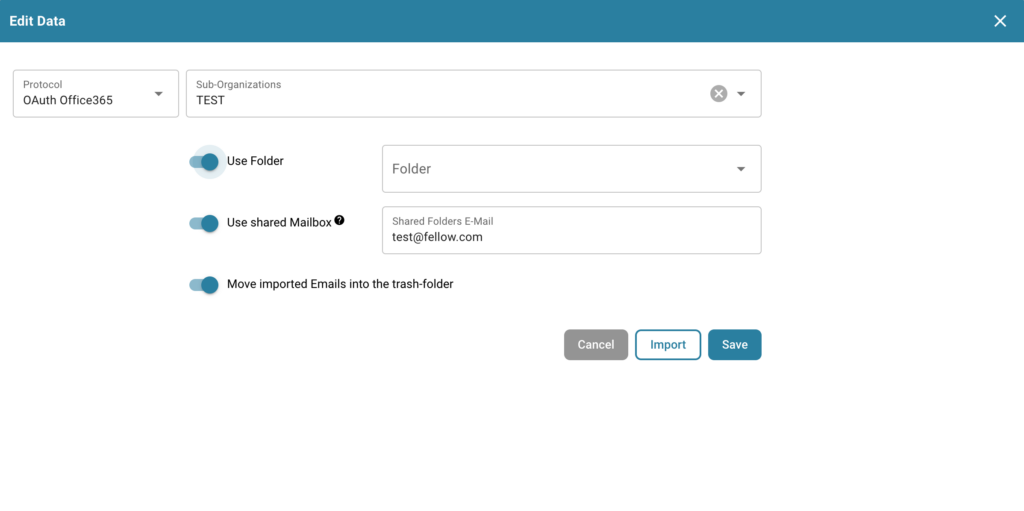
Press the FINISH AUTHENTIFICATION button and you will be taken to this menu
Use Folder
If you are using a folder other than your inbox, enter the folder name after enabling the slider.
Use Shared Mailbox
If you want the email import to access an inbox or a folder of a shared mailbox, input the email address here after enabling the slider.
Move imported emails to trash
If you want to import all emails, not just the unread ones, and have them moved to trash then activate this. If not, it will only check for unread emails, import the documents, set the email to read and leave it in its current place.
In the event of you receiving an error message indicating you do not have the rights to establish such a connection, someone with admin rights within Azure would need to authorize this connection. For more information, click here.
Click the IMPORT button to fetch the documents from your mailbox and import them into DocBits. Once everything is to your liking, press the SAVE button.
It’s that simple! With just a few clicks, you can streamline your document management process and save time.