You will need 4 connection points for this dataflow, 3 API connection points for the different tax code categories (full, reduced and free) and an Application connection point representing your LN company.
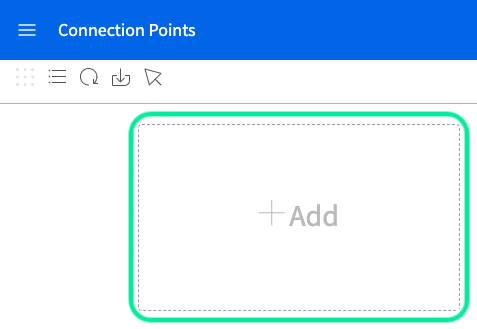
In order to create new connection points, select the “+ADD” button”
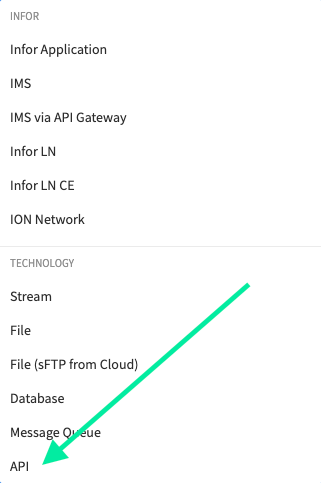
Select “API” at the bottom of the list of options
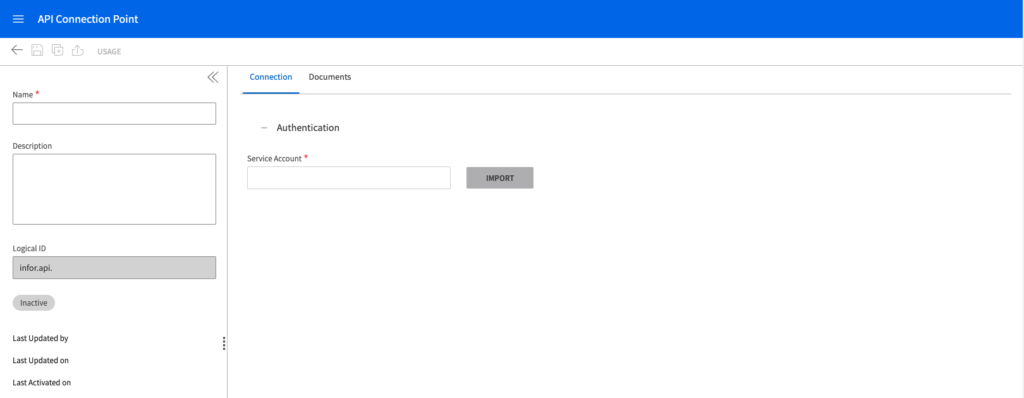
You will be taken to the following page
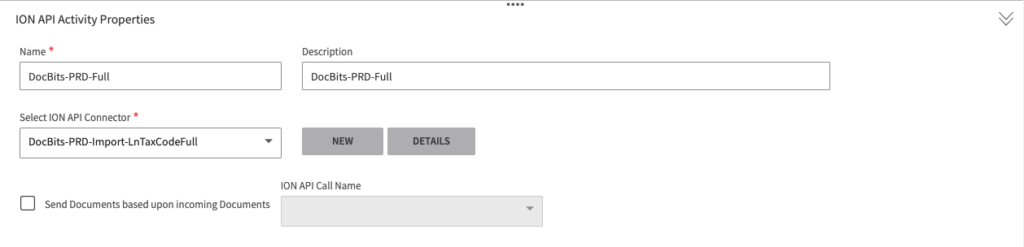
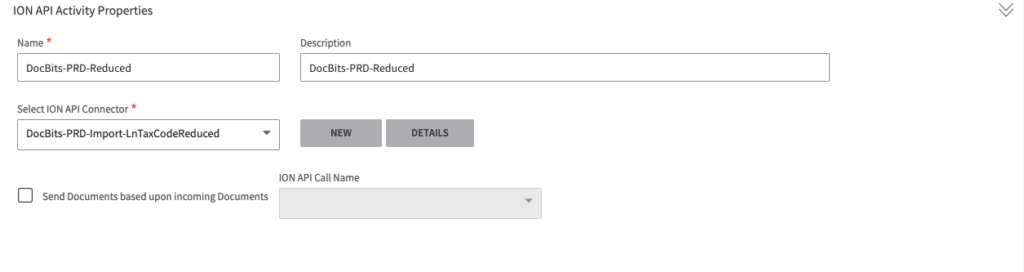
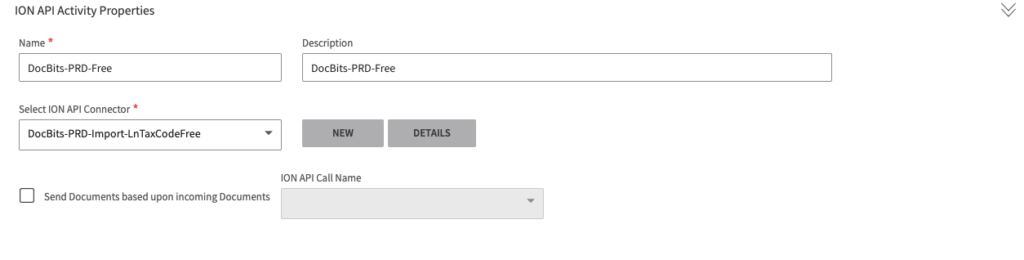
This is where you will enter all the details of the TaxCode connection point. For each of the three connection points you will be creating do the following
Enter a Name: TaxCodeFull, TaxCodeReduced, TaxCodeFree
Description: This can be the same as the Name or similar
Import a service account you created (more info here).
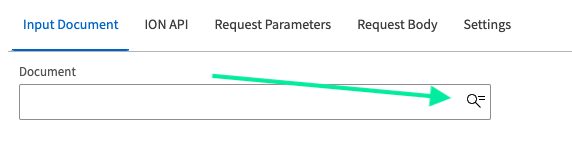
Switch to the “Documents” tab and select the PLUS icon to add the BOD we need, like below
Search for the BOD
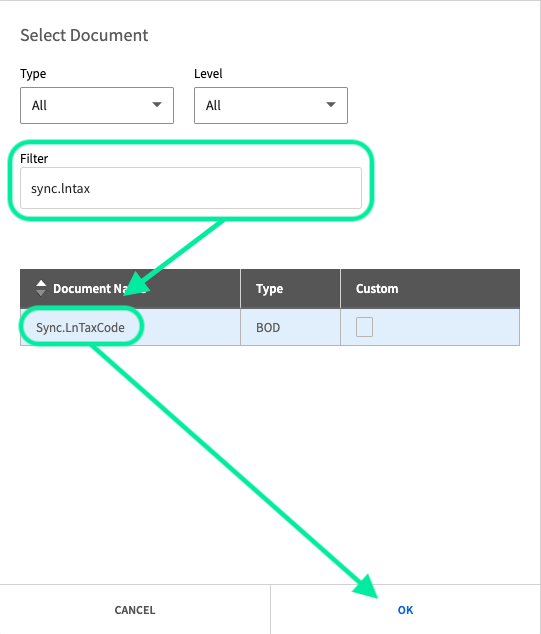
Search for the BOD called “Sync.LnTaxCode”, click on it and press “OK” to add the BOD.
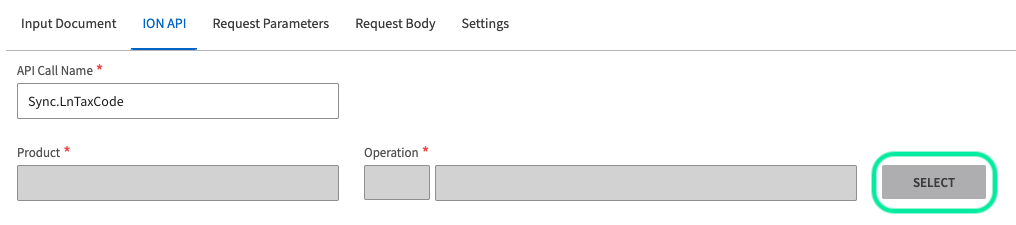
Move on to the ION API section. Under API Call Name you can use the name of the BOD, Sync.LnTaxCode
Press the “SELECT” button
Select the API you configured for the environment you are working with and search for the following API. Once you have selected it, press “OK”.
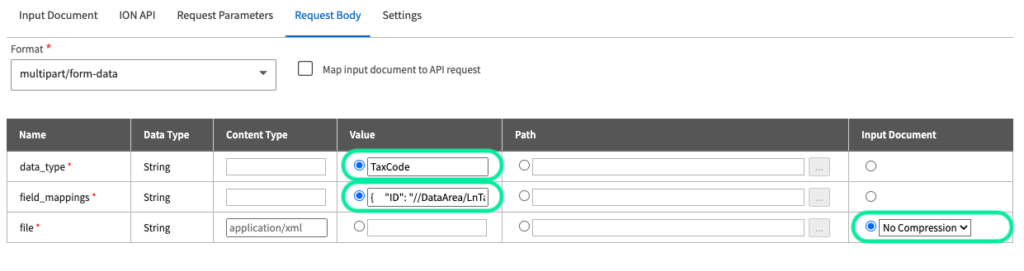
Next, switch to the Request Body tab.
Here is where there will be a slight change for each connection point, this is seen in the field mappings you will assign to each tax code as they differ slightly.
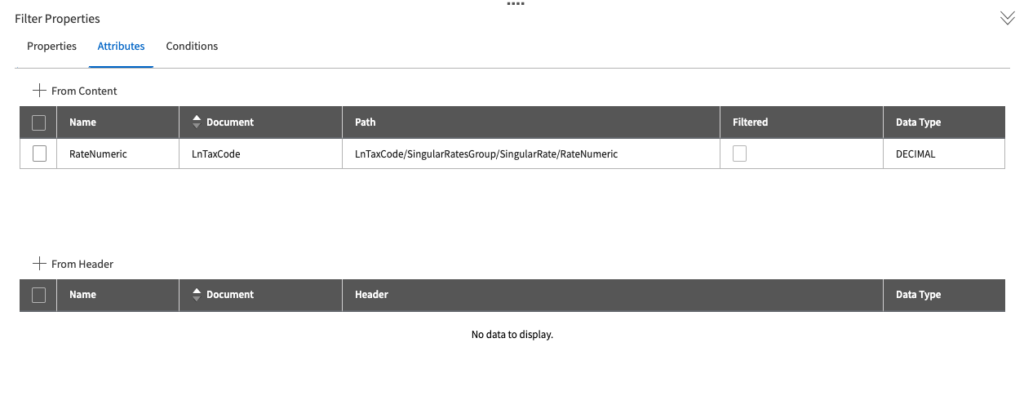
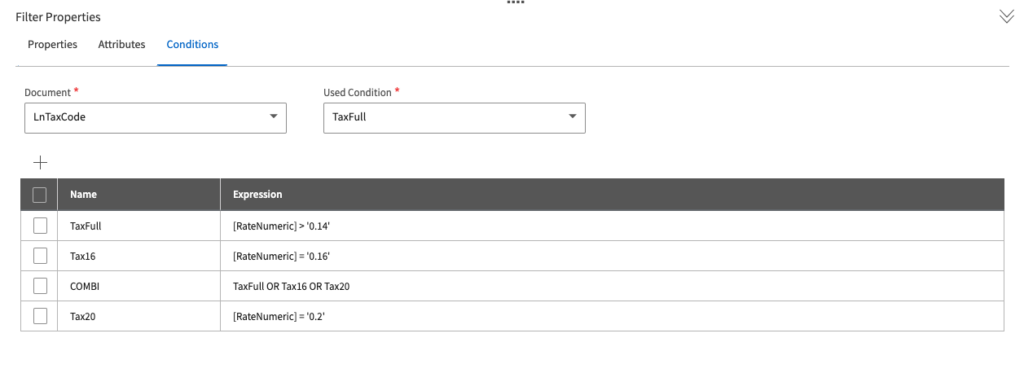
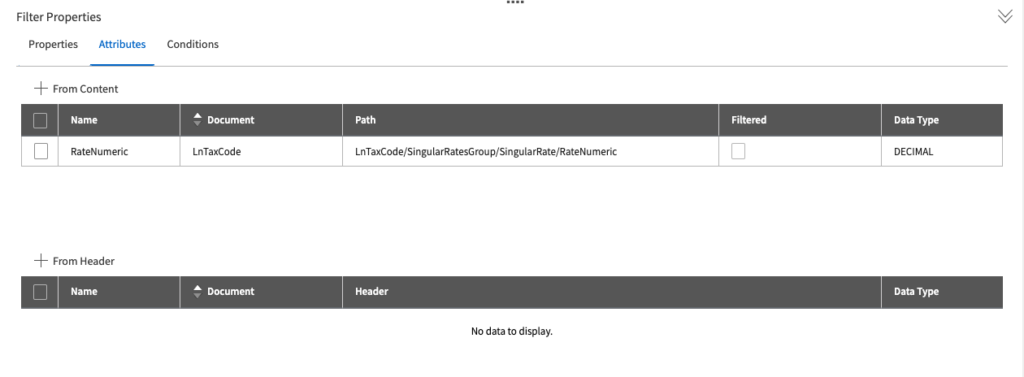
In the field_mappings row, under value, is where you will put the specific field mappings for the specific tax code connection point you are creating (full, reduced or free). These mappings are available here.
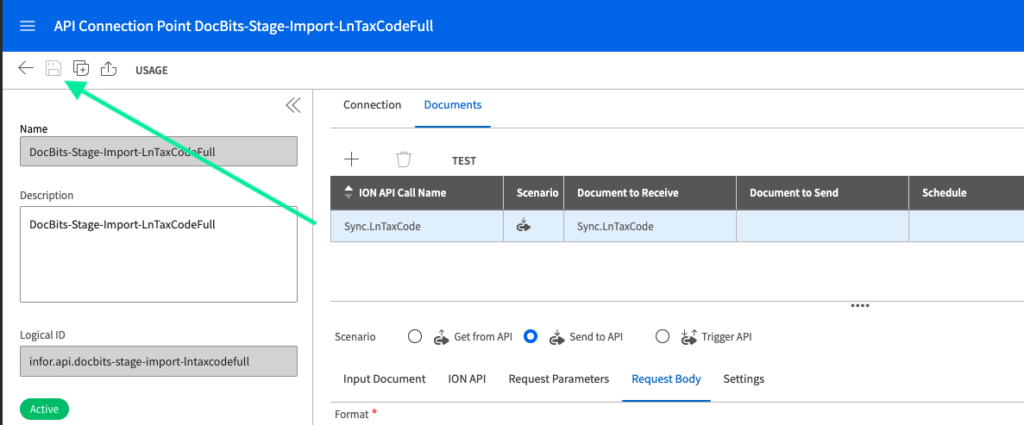
The end result should look the same or similar to the image above. Once this is done, click the SAVE option located here.
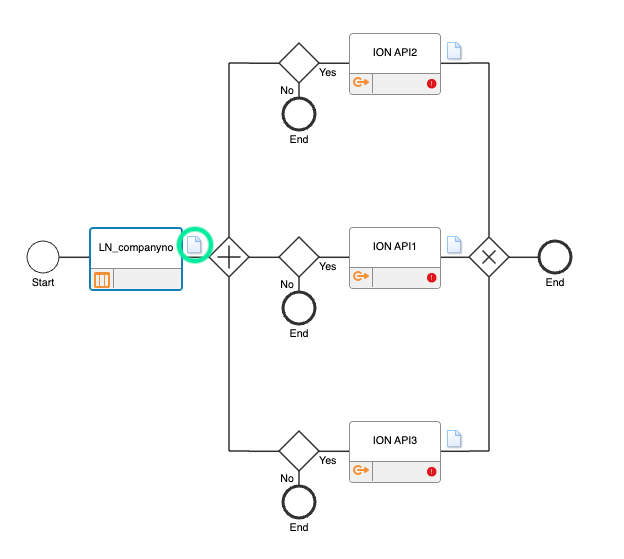
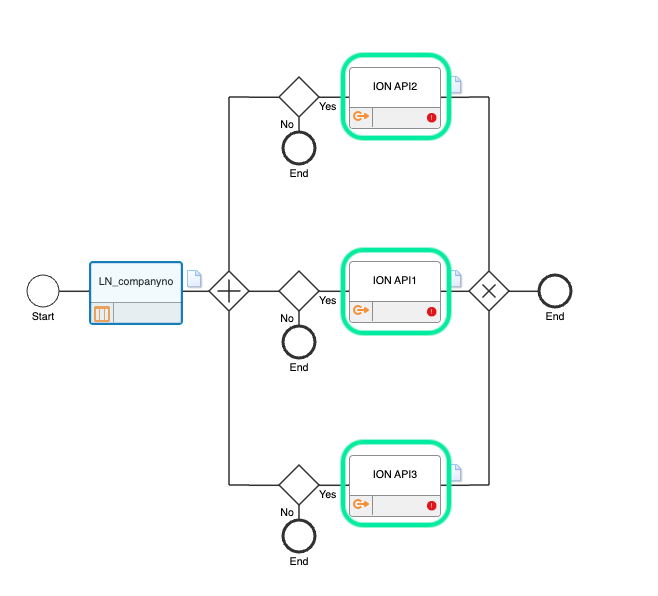
Dataflow Configuration
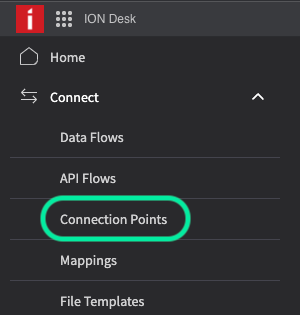
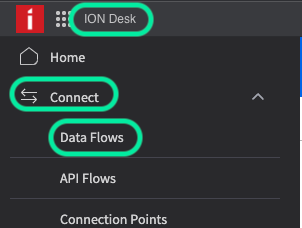
Navigate to ION Desk → Connect → Data Flows
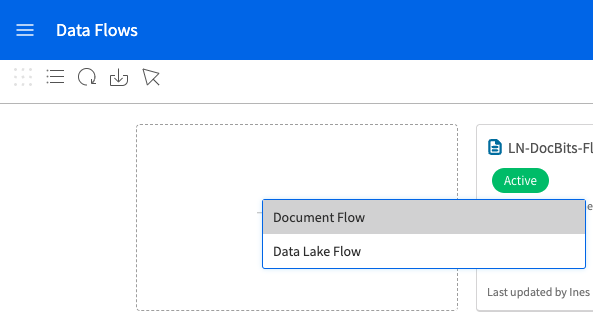
Click on “+ADD” and select document flow
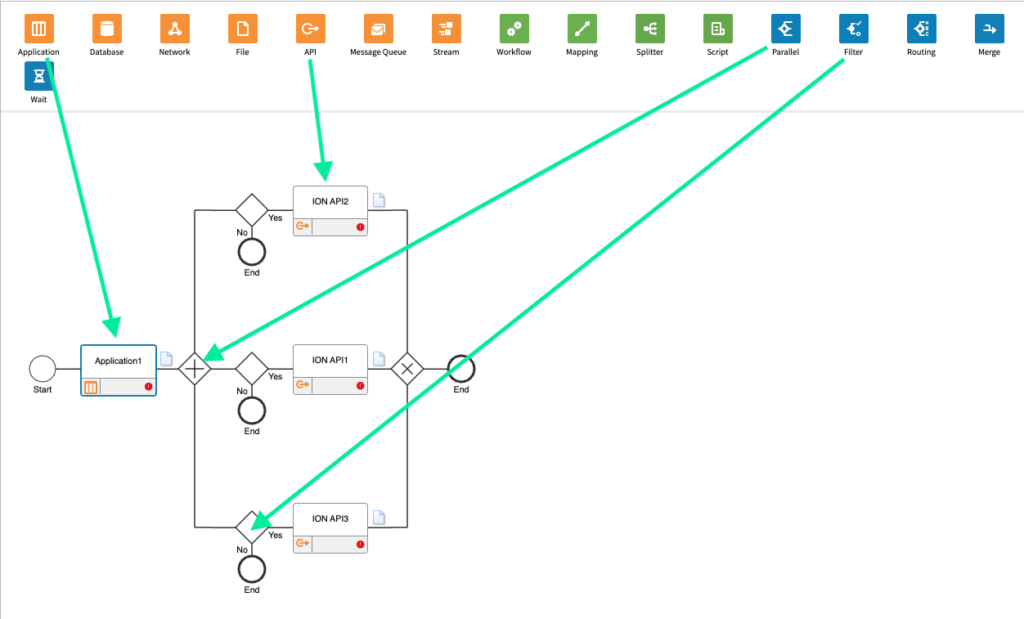
Create the following data flow by dragging and dropping the components from the to menu
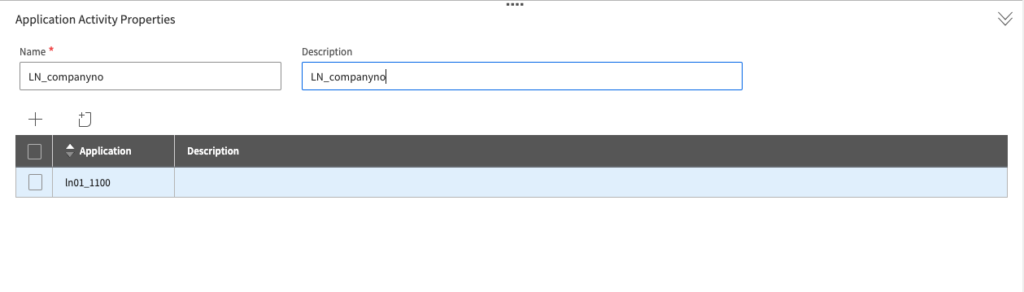
Application
Here is where you will select your LN company, the final result should look similar to the following
Document
This is where you will add the Sync.LnTaxCode BOD from earlier, the result looks as follows
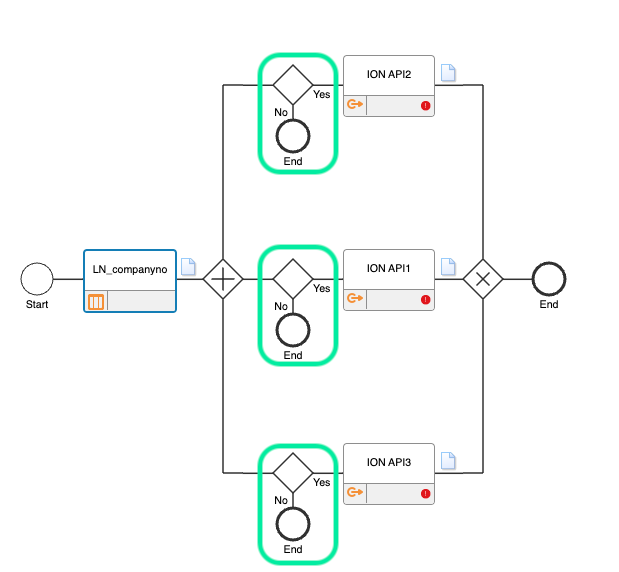
Filters
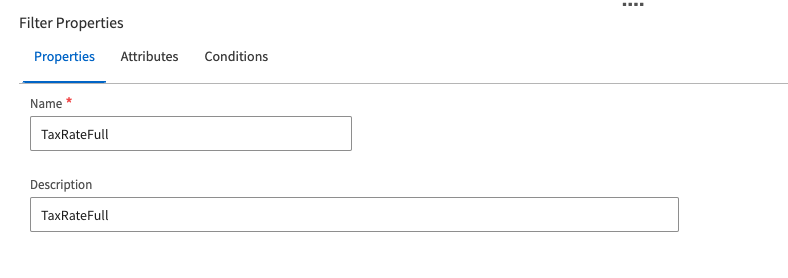
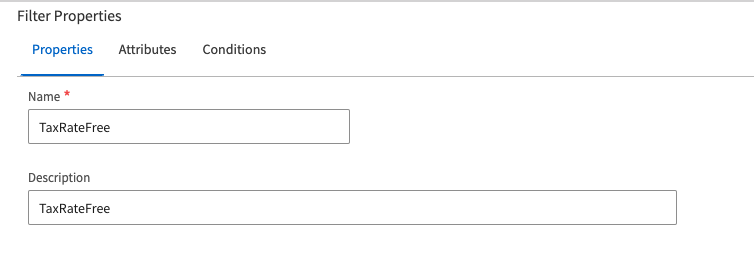
Filter 1 (top) – Full
The Name and Description will depend on the environment you are using and your preferences.
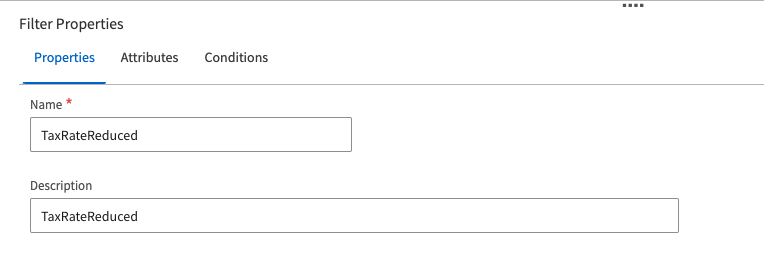
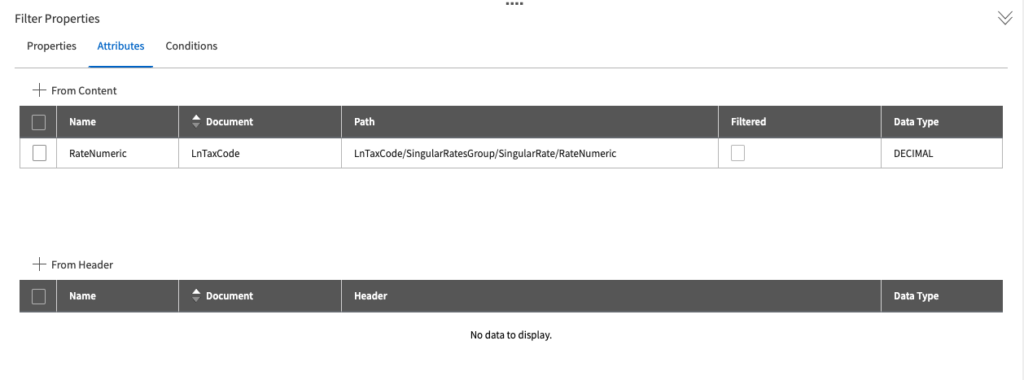
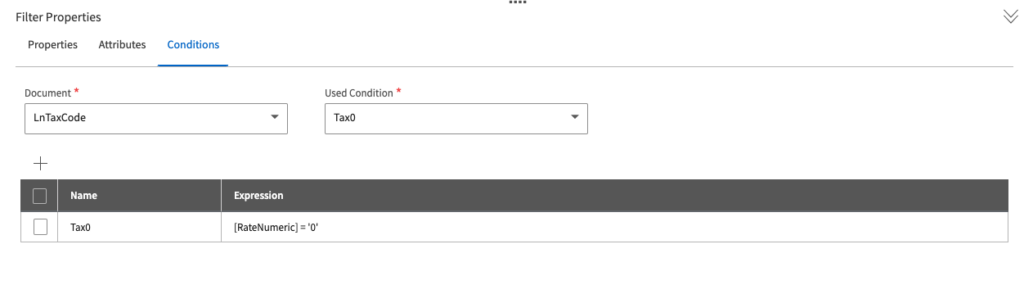
Filter 2 (middle) – Reduced
The Name and Description will depend on the environment you are using and your preferences.
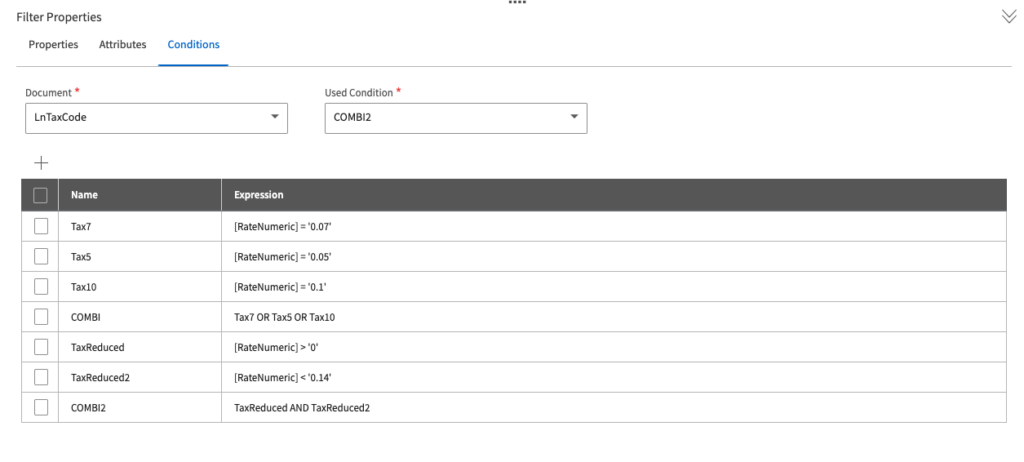
Filter 3 (bottom) – Free
The Name and Description will depend on the environment you are using and your preferences.
APIs
This is where you select the API connection points you created earlier, this is done by selecting the API under the “Select ION API Connector” drop down menu.
API 1 (top) – Full
The Name and Description will depend on the environment you are using and your preferences.
API 2 (middle) – Reduced
The Name and Description will depend on the environment you are using and your preferences.
API 3 (bottom) – Free
The Name and Description will depend on the environment you are using and your preferences.
Once all the above is done, SAVE and ACTIVATE the data flow by pressing the following buttons
BOD Triggering (LN)
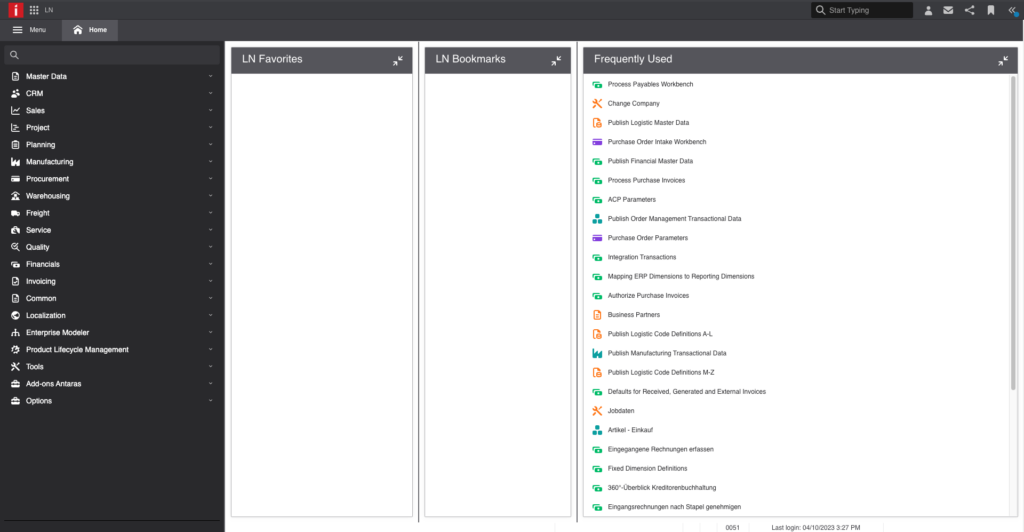
Open LN in Infor
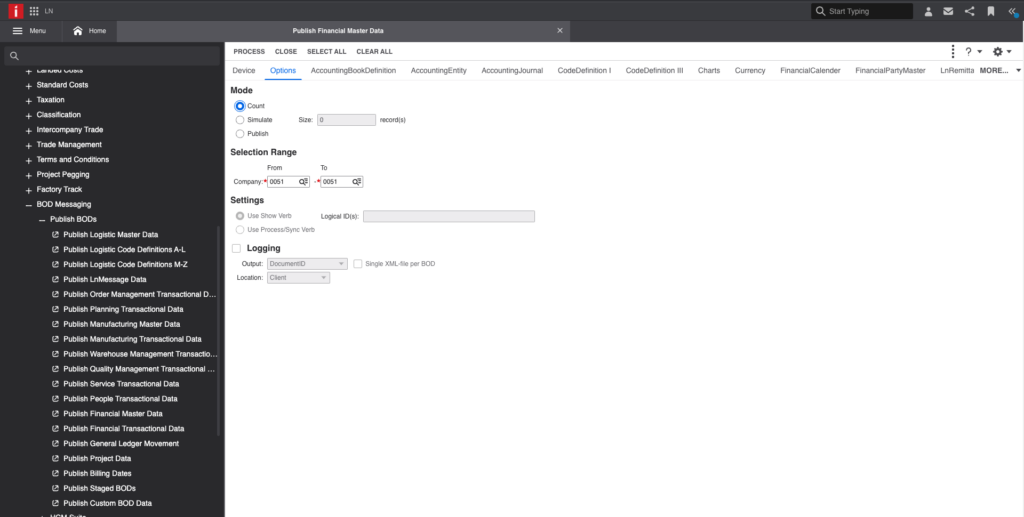
Navigate to Common → BOD Messaging → Publish BODs → Publish Financial Master Data
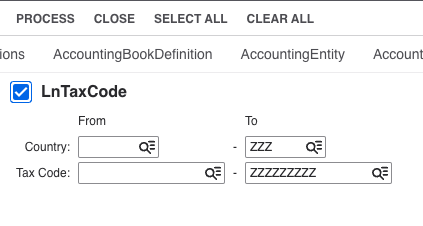
Select MORE and click on LnTaxCode
Tick the checkbox to select the LnTaxCode BODs
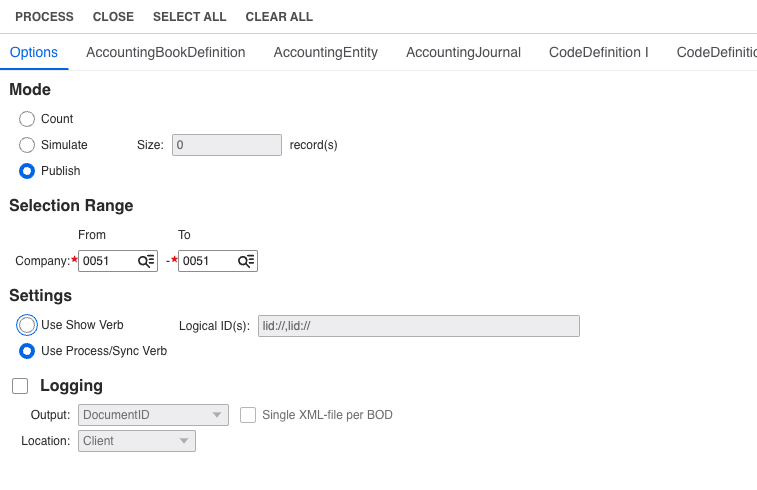
Navigate back to the OPTIONS tab, your configuration should look as follows
When you would like to publish the BODs, select PROCESS.
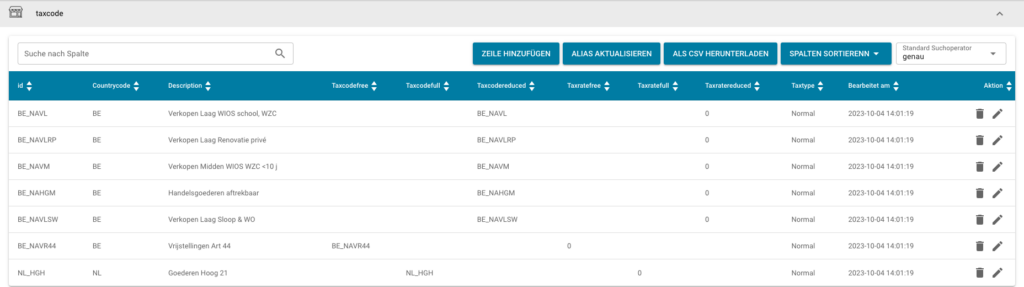
The end result should give you a similar table in your DocBits environment.