M3 Configuration

Prerequisites

Import Mapping Files

Before you setup the dataflow, you need to import the mapping files into InforOS

This is done by:

  • In ION Desk → Connect and open Mappings

  • Click on the Import icon

  • From here you need to select the various mapping files you will need which include: SyncCaptDoc_SyncSuppInv, SyncSupplierInvoice_LoadSupplierInvoice, and LoadSupplierInvoice_ProcessSupplierInvoice.

  • Once you have imported all the mappings files, make sure to approve each of them by clicking the tick icon within each of their squares on the Mapping dashboard.

DocBits to M3

The next step is to setup the Data Flow in ION Desk, navigate to the ION Desk application and select Data Flow → + ADD → Document Flow like below

You will then see this page, this is where you will build the flow of information from DocBits to M3

An M3 dataflow will look similar to what is shown below (there are 3 DocBits applications and APIs due to it being used for 3 separate environments).

All parts of the chain are dragged and dropped from the top section

In the chain, DocBits and M3 are both Applications whereas in between them there are mappings that convert the data into a form that can be understood by the next section of the train and “map” the information so that it goes to where it is needed or meant too.

DocBits Application

Give it the appropriate name such as “DocBits” then select the plus sign and search for the connection point you created earlier such as DocBits_Export or similar and click on it.

To create this connection point, go to ION Desk → Connect → Connection Points

Click “+ Add”

Select “IMS via API Gateway” and fill in the following information

The ION API Client ID is in the ION API File you created at How to Create an ION API File under the “ci” value.

Switch to the document tab, and add the Sync.CaptureDocument BOD to the DocBits connection point like below.

Then save the connection point by pressing the disk icon in the upper-left corner.

Navigate back to the Dataflow section of ION Desk to access your dataflow. Your DocBits application should look similar to what is shown below.

Mapping 1

The first mapping node should look as follows

Mapping 2

The second mapping node should look as follows

Mapping 3

The third mapping node should look as follows

M3 Application

There should already be a M3 or similarly named connection point created in INFOR so just like the DocBits Application you select it by clicking the “+” sign and it should look as follows

DocBits API

You will first need to create this API as a connection point which is done by:

Ion Desk → Connect → Connection Points

Click “+ Add” and select API

The information you fill in should look like this

Switch to the document tab and add the following configuration

Acknowledge.SupplierInvoice

The configuration for this BOD is as follows

Make sure you have selected the “Send to API” option in the above menu.

Lastly ensure that you alter the request body as well to look like this.

Repeat this process for the rest of the BODs, each configuration is shown below.

Sync.PurchaseOrder

The configuration for this BOD is as follows

Sync.RemitToPartyMaster

The configuration for this BOD is as follows

Sync.SupplierPartyMaster

The configuration for this BOD is as follows

BODs

The following configurations should look as follows:

  • First
  • Second
  • Third
  • Forth
  • Fifth

The last icon should be empty as it is not carrying any document or information.

Once you have added all necessary nodes to the data flow, press this button to activate the data flow

M3 to DocBits

This process is very similar to DocBits to M3 in INFOR.

API Connection Point

Here, like before, you will create a connection point if one does not exist. This time it should be called DocBits_Import or similar.

  • This time, click “+ Add” and select “API”

  • You will be taken to this screen

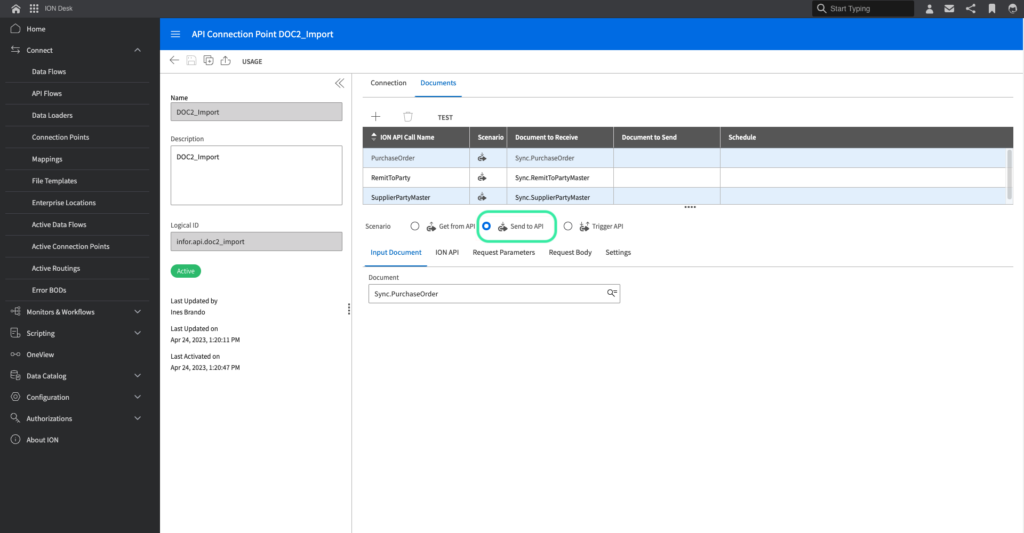
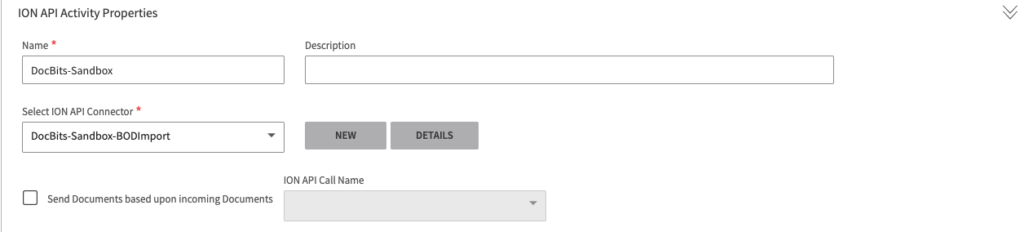
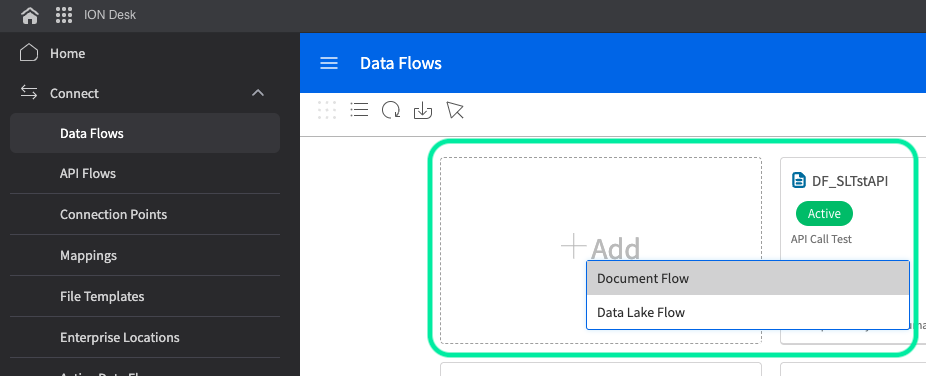
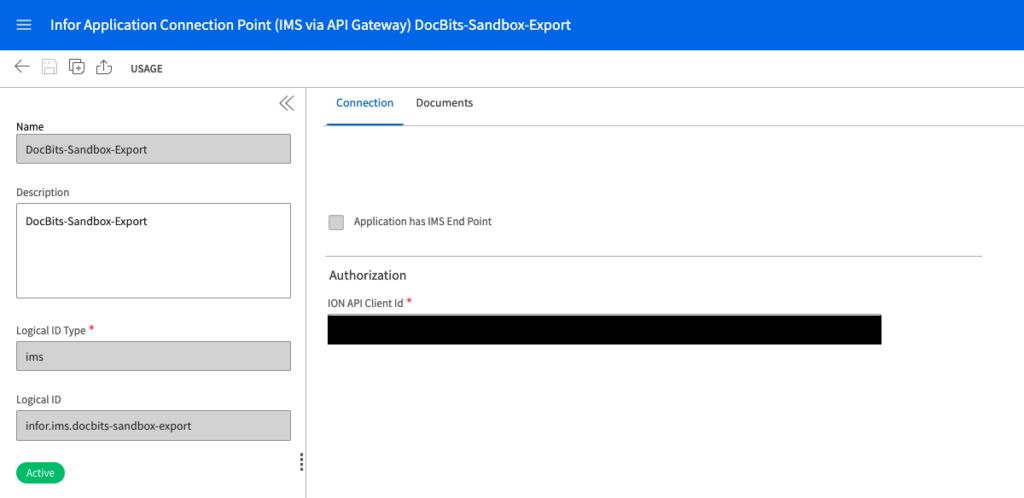
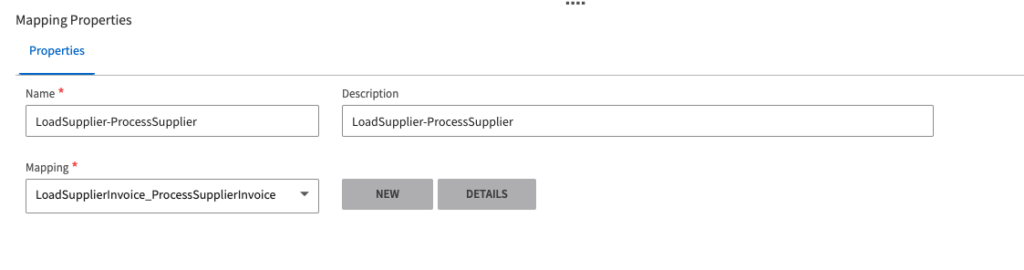
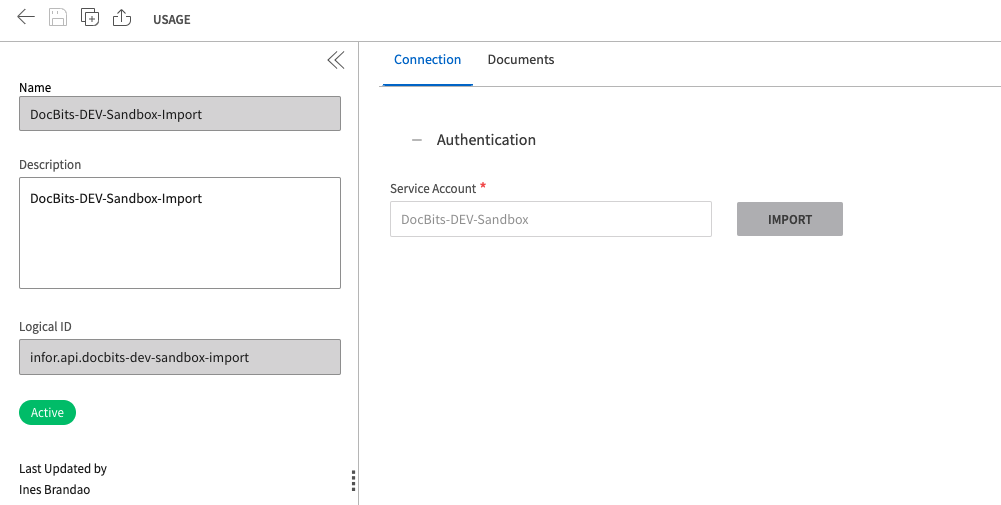
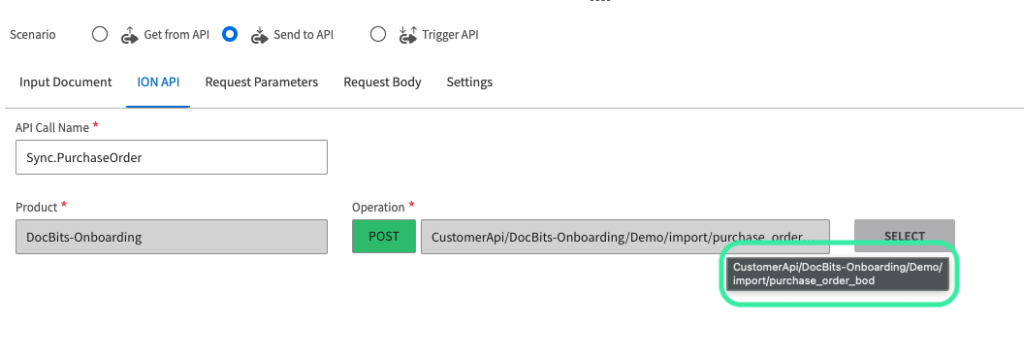
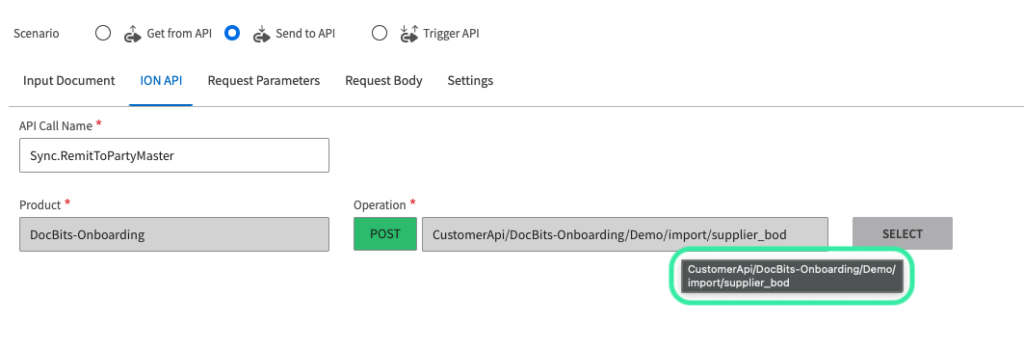
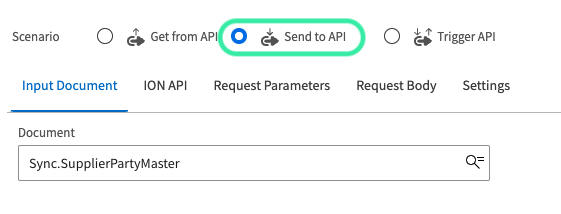
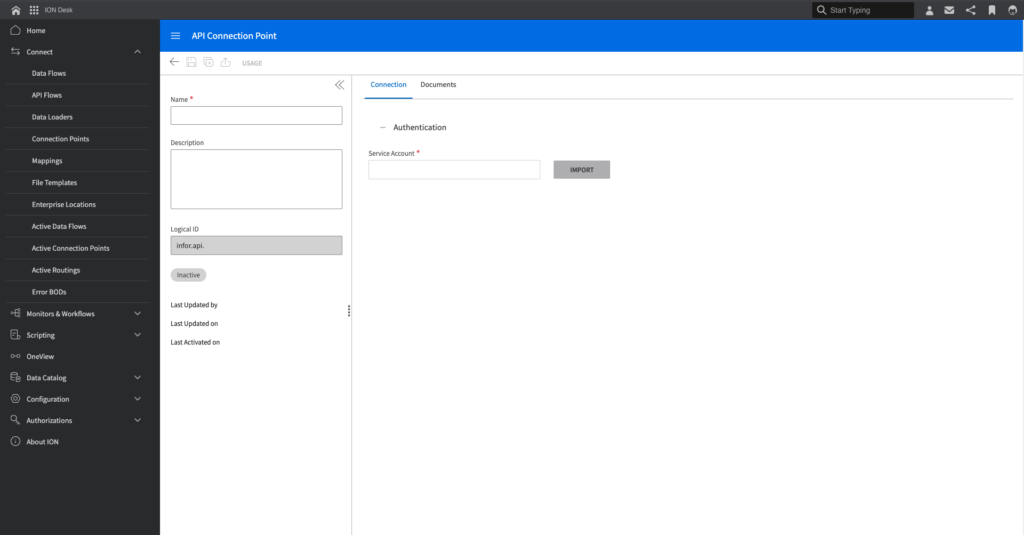
This is where you will fill out the necessary information and you are going to add to the M3 to DocBits connection point.

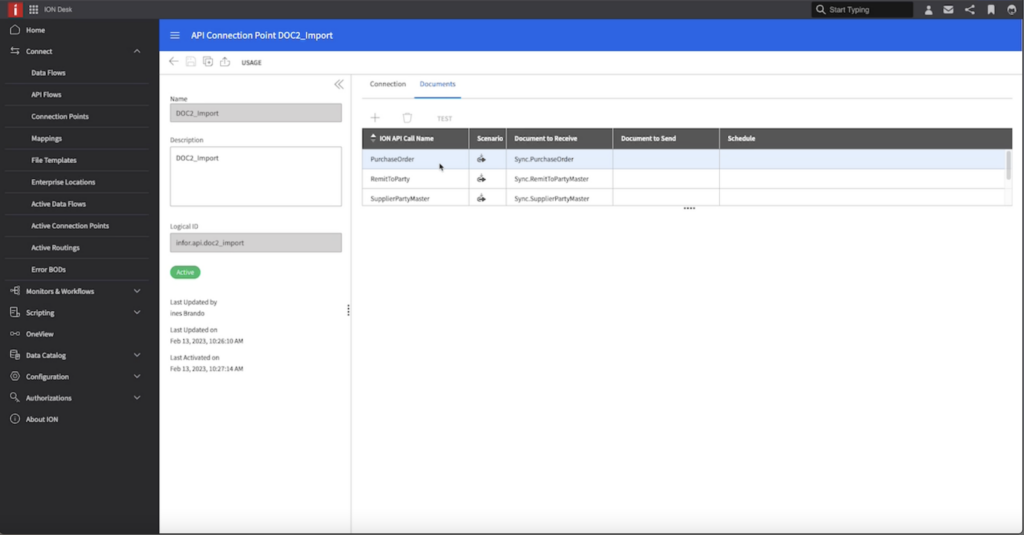
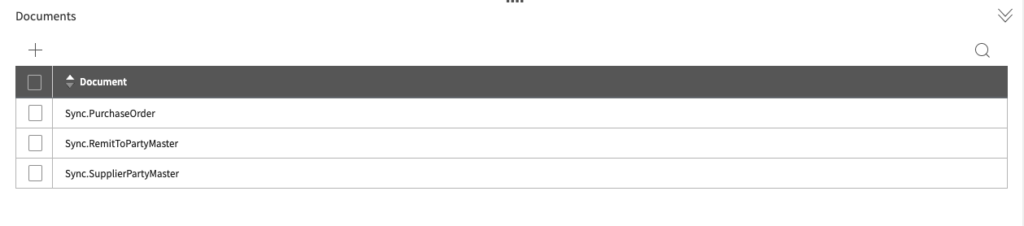
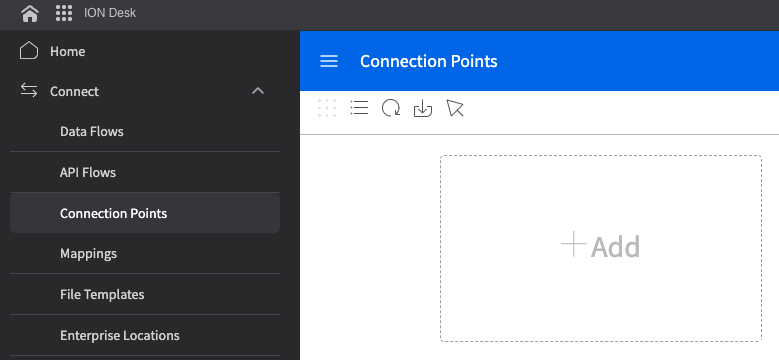
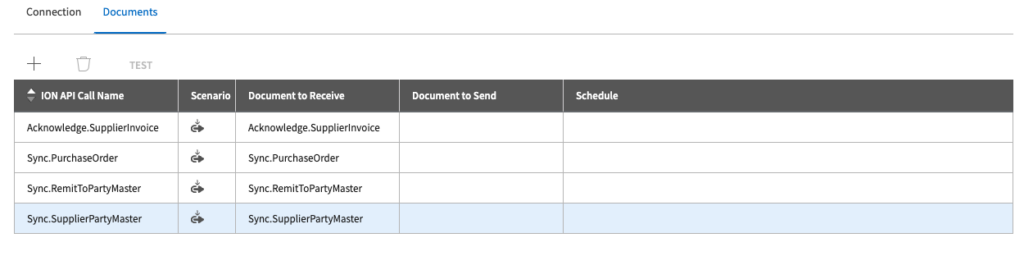
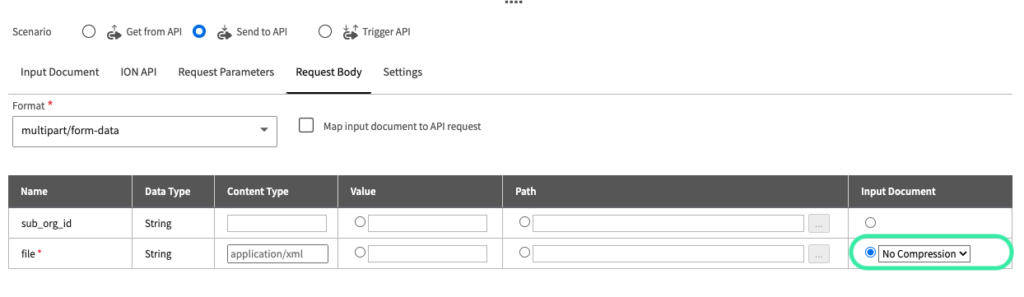
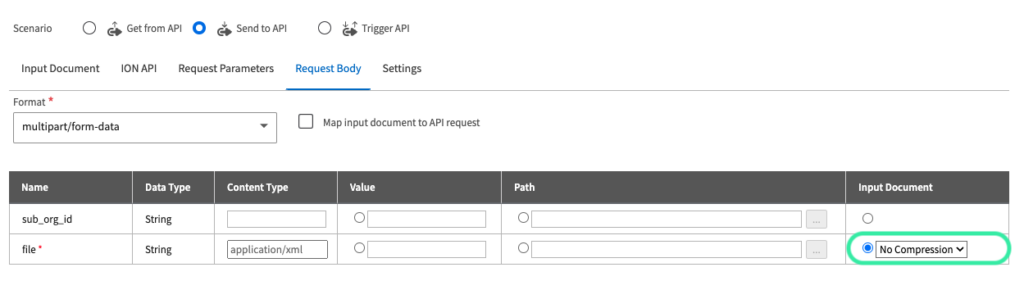
Once you have added the service account to the connection point, go to the “Documents” section of the connection point creation screen and make sure all 3 of the below files are inserted there.

Make sure each ION API Call is set to “Send to API”

Once all 3 are added, you need to insert other information into each ION API Call namely in ION API and Request Body

BEFORE you do this, make sure the APIs are configured in INFOR

This is demonstrated in: Creating ION API Endpoints

M3 Import Dataflow

In ION Desk → Connections → Data Flows, press the “+ Add” icon and select Document Flow (like before) to create a new Data Flow.

The DocBits_Import Dataflow should look like this

Where M3 is an Application node and DocBits is an API node.

  • The M3 node should look like this

  • The DocBits node should look like this ( 3 nodes in example due to 3 different environments being used)

The centre icon should look like this

Within this icon, the following should be configured

(Containing the 3 files you added to the DocBits_Import connection point which you created earlier)

Once this is all complete, you can ACTIVATE the data flow by pressing the following button

Triggering BODs from M3

Add BODs in M3

Open the M3 application from the burger menu of InforOS

When on the home screen, type “Command + r” to open the the Command Prompt box

Then type “EVS006” and press “OK”

You will be taken to a menu like this

For this example, the triggering of the PurchaseOrder BOD will be demonstrated

First, you need to type the name of the BOD underneath BOD noun (in this case PurchaseOrder) and “MPHEAD” underneath Table like this.

Other examples of different BODs are indicated below

Once you have added both these fields at the top, click on the plus icon

You will be taken to a new menu, Under Details → BOD Description type the name of the BOD. In this example for PurchaseOrder it would be PurchaseOrder, then simply click next in the bottom-right corner to add the BOD.

Trigger BODs

To trigger a BOD, we once again, open the M3 application from the burger menu of InforOS

When on the home screen, type “Command + r” to open the the Command Prompt box

Then type “EVS006” and press “OK”

You will be taken to a menu like this

We select the BOD we want to trigger, for this example, we will use SupplierPartyMaster, and right click on its name Related → Run

You will be taken to the screen below, change BOD verb to “Sync”

Click on NEXT in the bottom-right corner.

You will then receive an alert that informs you the BODs have been sent.

Test BOD Triggering

In M3, go to the Menu → Administration Tools → Enterprise Collaborator Administration

There will be BODs that indicate “FINISHED” if they were sent like the SupplierPartyMaster Bods below which indicate that they were triggered

Another way to check is to go to the ION Desk application and open OneView

Here you can search for the BODs you triggered and if they were successfully triggered, you will find them when you search in the “Last Hour”.

Table of Contents